By the end of this lab, you will be able to:
- Explain how the chemical properties of water (polar covalent bonds and hydrogen bonds) relate to the physical properties of water (high surface tension, cohesion, adhesion, changes upon freezing, and water as a solvent)
- Make predictions and explain results for experiments that relate to the physical and chemical properties of water
Required prior knowledge and textbook readings:
- Properties of water (chemical and physical)
- Chapter 2, Section 2.2: Water in Concepts of Biology textbook
Introduction:
An individual water molecule consists of one oxygen atom bound to two hydrogen atoms (H2O) by covalent bonds. Oxygen is more electronegative than hydrogen, thus the electrons shared via the covalent bonds spend relatively more time around the oxygen as compared to the hydrogens. Therefore, the covalent bonds in water are polar, and this creates partial positive and partial negative charges in a single water molecule. When many water molecules are together, these partial charges interact by hydrogen bonding, where the partial positive charge in one hydrogen will bond with the partial negative charge in an oxygen of another water molecule (since opposite charges attract). The properties of water that allow life to flourish on Earth all arise from the polarity in the covalent bonds and the tendency of water molecules to extensively hydrogen bond with one another.
In this lab, you will examine the properties of water by performing a series of small experiments using common household items. The materials needed for each experiment are listed throughout, but also see the figure below for an image and complete list of all of the materials you will need for this lab.
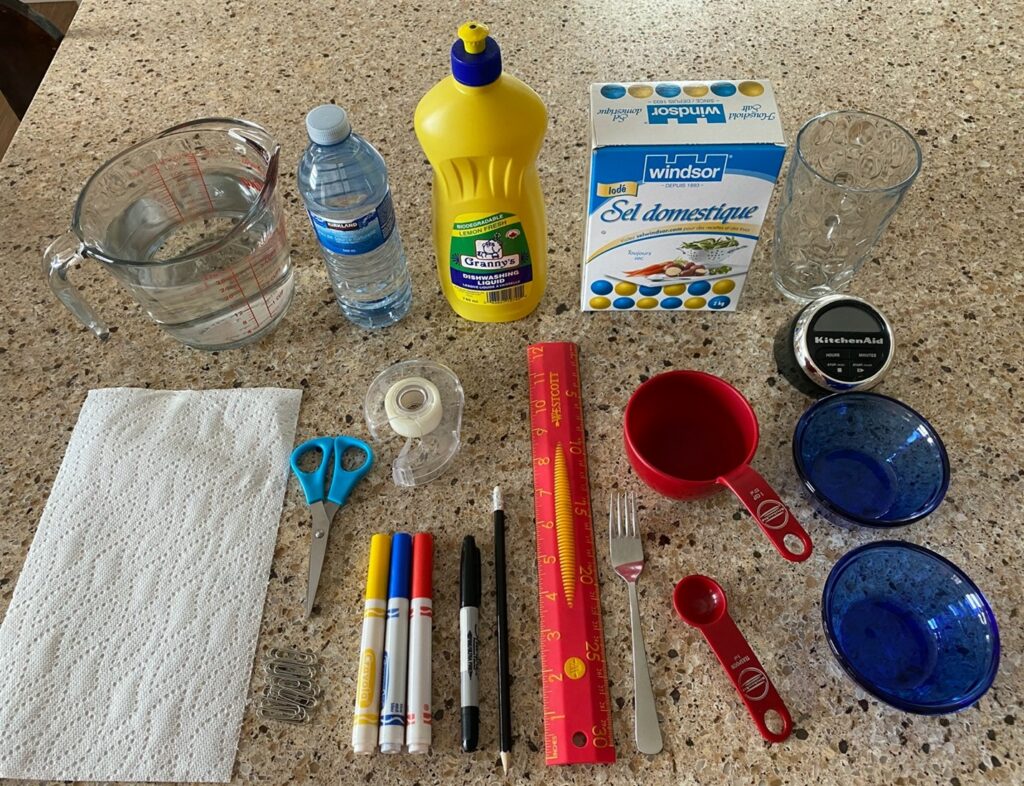
Figure 1. All materials required for Properties of Water lab experiments: measuring cup, plastic water bottle, liquid dish soap, salt, glass cup, paper towel, scissors, tape, paper clips, water-soluble markers, permanent marker, pencil, ruler, fork, measuring cup and spoon, timer, small bowl or shallow cup (not pictured: freezer, smartphone or camera).
Part 1: Water Volume
In this experiment, you will explore what happens to volume of water when it goes from liquid to solid.
Materials:
- 1 plastic water bottle with lid
- 1 permanent marker
- ruler
- freezer
Method:
1. Remove any labels from the outside of your plastic water bottle. Fill the bottle to approximately 3/4 full with tap water.
2. Secure the lid on the bottle and stand it up on a flat surface. Use your permanent marker to mark the level of the water in the bottle. with a straight line. Use your ruler to measure how far away the water line is from the bottom of the cap, and record this number as your “before freezing” measurement.
3. Take a picture of the bottle with the marker line indicating the water level clearly visible.
4. Place the bottle upright in a freezer for at least 12 hours.
[INSERT H5P ACTIVITY ABOUT THE PREDICTION]
5. After at least 12 hours, remove the bottle from the freezer and observe where the water line is in comparison to what you originally marked. Use your ruler to measure how far away the water level is from the bottom of the cap, and record this number as your “after freezing” measurement. Take a picture of the water bottle.
[INSERT H5P ACTIVITY ABOUT THE RESULTS – e.g. volume inc or dec]
Part 2: Surface Tension
In this experiment, you will explore the surface tension of water and how it changes in the presence of salt and an amphipathic substance (soap).
Materials:
- 1 small bowl or shallow cup
- minimum 15 small metal paper clips
- 1 fork
- 1 tablespoon
- 1 measuring cup
- 3 cups of tap water
- 1 tablespoon of table salt
- liquid dish soap
Method:
1. Use the measuring cup to fill your small bowl or shallow cup with precisely 3/4 cup of tap water (at approximately room temperature).
2. Using the fork, gently place one paper clip on the surface of the water (you may need to practice for the first few).
3. Once you have a paper clip on the surface of the water, take a picture.
4. Continue to add paper clips to the surface of the water. Record the maximum number of paper clips you can add to the surface of the water without any of the paper clips falling to the bottom. Once paper clips start falling to the bottom, empty the bowl, rinse it out, and dry the paper clips.
[INSERT H5P QUESTION ABOUT WHY PAPER CLIPS CAN SIT ON THE WATER]
5. Use your measuring cup to refill the bowl with 3/4 cup of water. Add 1 tablespoon of table salt and gently mix with the fork until you can no longer see the salt crystals.
[INSERT H5P QUESTION ABOUT SOLUTE/SOLVENT OR WHAT HAPPENS WHEN SALT IS MIXED WITH WATER]
6. Using the fork, gently place a paper clip on the surface of the water.
7. As before, continue to add paper clips to the surface of the water. Record the maximum number of paper clips you can add to the surface of the water without any of the paper clips falling to the bottom. Once paper clips start falling to the bottom, empty the bowl, rinse it out, and dry the paper clips.
8. Lastly, use your measuring cup to refill the bowl with 3/4 cup of water. Add 3 drops of liquid dish soap and gently mix with the fork (try not to generate lots of bubbles).
9. Using the fork, gently place a paper clip on the surface of the water.
10. As before, continue to add paper clips to the surface of the water. Record the maximum number of paper clips you can add to the surface of the water without any of the paper clips falling to the bottom. Once paper clips start falling to the bottom, empty the bowl, rinse it out, and dry the paper clips.
[INSERT H5P QUESTION ABOUT SOAP BEING AMPHIPATHIC AND WHICH PROPERTY OF WATER IS AFFECTED]
Part 3: Cohesion and Adhesion
In this experiment, you will observe as water climbs a polar substance (paper towel) due to its adhesive and cohesive properties.
Materials:
- 1 sheet of paper towel
- 1 tall drinking glass (clear, if possible)
- 1/4 cup of tap water
- 1 pencil
- 1 piece of tape
- 1 ruler
- 1 pair of scissors
- water-soluble (non-permanent) coloured markers
Method:
1. Use your scissors to cut a strip of paper towel that is 2 cm wide and 15 cm long.
2. Use your ruler to measure 2 cm from the bottom of the strip’s long edge, and draw a thick line at this spot using a water-soluble coloured marker of your choice (see Figure 2 below).
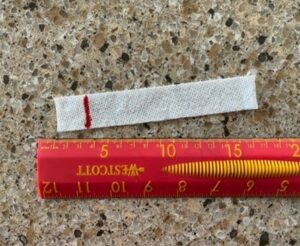
Figure 2. A water-soluble marker line approximately 2 cm from one end of a strip of paper towel.
3. Tape the top of the paper towel to a pencil to keep it upright in the drinking glass (as shown in Figure 3 below), or tape the paper towel directly to the top of the glass so that it stays upright.
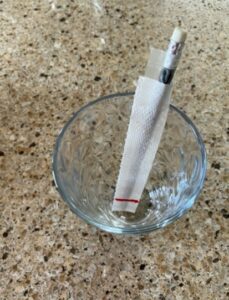
Figure 3. Paper towel strip with water-soluble marker drawn line 2 cm from the bottom, taped to a pencil standing upright in an empty water glass.
4. Pour a small amount of tap water into the bottom of the water glass (until the water fills approximately the bottom 1 cm of the glass). DO NOT LET THE WATER LINE TOUCH THE MARKER!
5. Take a “before” picture of your experiment as soon as you add the water.
6. Continue to observe the water as it travels upwards, and take an “after” picture once the water reaches to the top of the paper towel strip.
[INSERT H5P QUESTION ABOUT PROPERTIES OF WATER INVOLVED IN CAPILLARY ACTION]
Assignment:
If required by your instructor, you can download the assignment for the Properties of Water lab here. Note that the file download works best using Microsoft Edge or Mozilla Firefox web browsers (not Google Chrome). Once you have completed the assignment, submit the file to your instructor as per their instructions.